Global Trusted Networks
Sometimes you might want to set up automated, global Trusted Networks for users and devices in the group. You would do this if:
1. You want to deploy Privatise primarily on remote devices. For example a laptop that an employee brings back and forth from home to the office. Trusted Networks can turn Privatise off when in the office, and on again when back at home.
2. Some employees travel to different client sites, and you want to disable Privatise on those sites because they need access to that internal DNS for whatever reason.
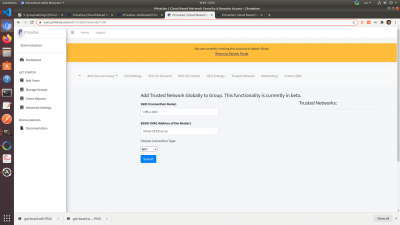
To set up Global Trusted Networks, go to “Trusted Networks” under group settings. There you will see three options:
1. The SSID of the network you want to add. This is for your internal use so you remember what network you're adding.
2. The BSSID of the network you want to add. This is the most important part, as the Privatise app will check for the BSSID of the network interface on the gateway it's connected to to see whether or not it's trusted.
3. Whether WiFi or Ethernet. WiFi and Ethernet typically are on different radio devices on the router/gateway device used to connect to the Ethernet. Because of that, you must specify whether you are adding WiFi or Ethernet to Trusted Networks.
Here's how to get the BSSID of the interface card on the router/gateway you want to add to Trusted Networks.
For WiFi:
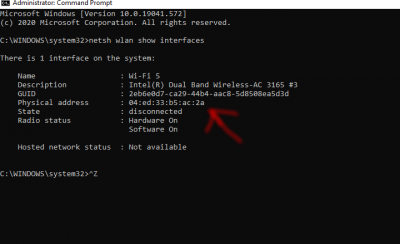
Type netsh wlan show interfaces in the command line (CMD).
Check the WiFi that you are currently connected to, and look for the physical address. That is the BSSID .
Enter that BSSID along with a nickname for your SSID into the Portal.
For Ethernet:
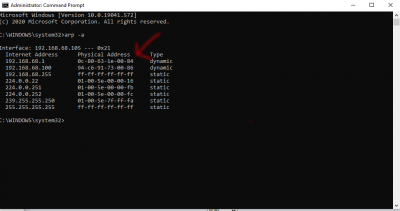
Type arp -a into the command line (CMD).
Check for Internet Address/NAT of your gateway (generally a router). Next to that will be the Physical Address of the gateway. That is your BSSID.
Enter the BSSID along with a nickname where it says SSID into the Portal. Make sure to click "Ethernet" in the dropdown.


