Table of Contents
Managing your Company Through Group Settings
Manage a Company by Groups
Groups are the fundamental building block of companies in Privatise. Every company has at least one group, but a company can also be broken up into multiple groups. By default, all the new users and devices belong to the default group. You will however be able to add groups, delete groups, split up users between groups etc. Through group policies, you'll be able to provision a ROC (Remote Office Cluster), create custom rules and permissions, have control over the group firewall, and more.
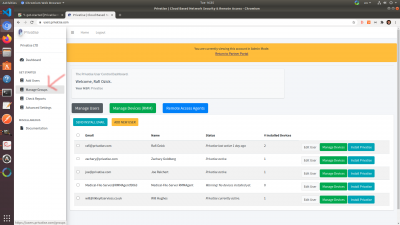
By default, you have one Default Group per company. You can manage it under Manage Groups in the left sidebar.
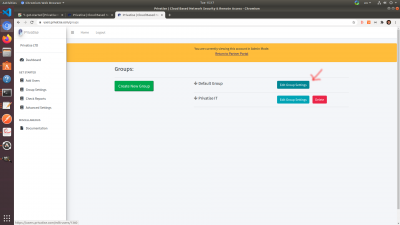
Once you click on that, you'll want to click on “Edit Group Settings” For the Default Group.
Now you'll have access to the group settings in the Default Group. If you have not added more groups, all of your users and devices will be controlled by the settings in this group.
Within group settings you can:
1. Provision and enable your ROC (Remote Office Cluster)
2. Set up whitelisting for sites you don't want the app to pass through.
3. Access your DNS filtering (ROC required)
4. Access virtual firewall (ROC required)
5. Create global trusted networks.
Provisioning a ROC
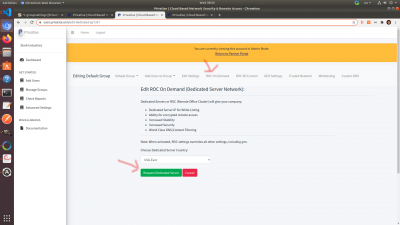
The ROC is the base for all of Privatise's advanced features. To provision a ROC, go to “ROC On Demand” and click “Request Dedicated Server”. Make sure to choose the location closest to where your client endpoints are based.
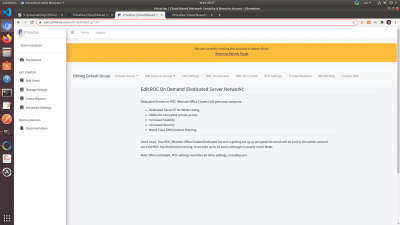
Once requested, you'll see a message telling you that you'll be notified via email once the ROC is provisioned. The email will go the main admin of the partner account. It takes between 20 to 30 minutes for the ROC to be provisioned.
Once provisioned, you will have access to more settings, DNS Filtering, the virtual firewall, and endpoints on the ROC will be able to communicate for Remote Access.
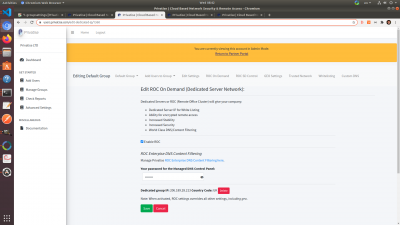
The ROC On Demand page will look like this once the ROC is provisioned:
Access Privatise ROC-DNS
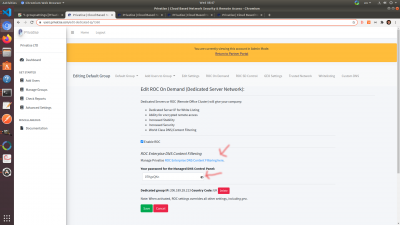
On that page, you'll be able to access your enterprise DNS filtering. Here's how:
1. Click on the eye to show the password.
2. Copy the password. Make sure to disable your password manager if you have one, as it might overwrite this password and give you the wrong one.
3. Click the blue link where it says “Manage Privatise ROC Enterprise DNS Content FIltering here.”
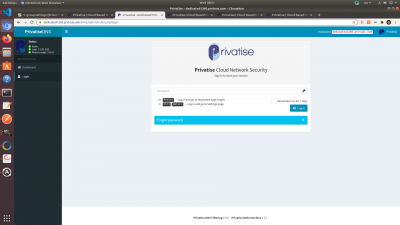
You will now be brought to the Privatise DNS Threat Analysis Dashboard login page. Enter the password you copied above and login.
Once logged in, you will get an overview of your Privatise DNS including query logs, queries that were blocked, etc. For more information on Privatise ROC-DNS & our DNS Filtering solution with the ROC, please go to ROC-DNS.
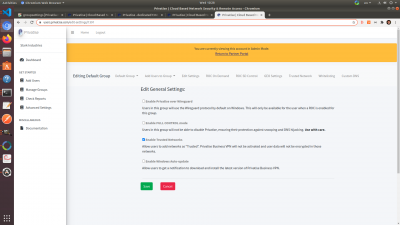
Edit General Group Setings
Under your group, you'll have access to managing general settings for that group.
There you'll be able to:
1. Enable PrivatiseGuard (Privatise over WireGuard on Windows). This is only available when you have a ROC provisioned and enabled, and should be used specifically for users with latency issues. Split Tunneling/Whitelisting will not be available for WireGuard users.
2. Enable Full Control. This prevents the user from having any access to the VPN. They will not be able to turn it on, off, or exit Privatise. All of their settings will be managed by the MSP from the managed user portal.
3. Trusted Networks. Enable or disable Trusted Networks on the endpoints. Enabling will allow users to add Trusted Networks via the client app. Global Trusted Networks will continue to work with this disabled, and Full Control overrides Trusted Networks.
4. Windows Auto Update. Enable or disable Windows auto update.
ROC SD Control / Virtual Firewall
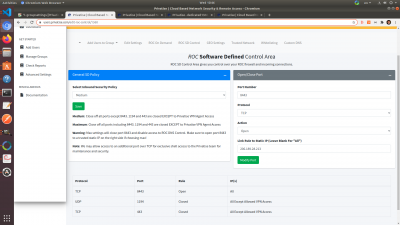
ROC SD Control is available for compliance with regulations like Cyber Essentials. By default, Privatise ROCs are locked down which the exceptions of ports used for the OpenVPN, IPSec, or WireGuard protocols. Those ports require a signed certificate in order to access, and are open for a business reason and have no compliance issues.
The one port that is open to the world is 8443 for the ROC-DNS Threat Detection dashboard. You have the option of closing that port, or opening it exclusively to certain IPs.
Unless you have specific compliance regulations that require you to close 8443, we recommend leaving the virtual firewall as is.
GEO Settings
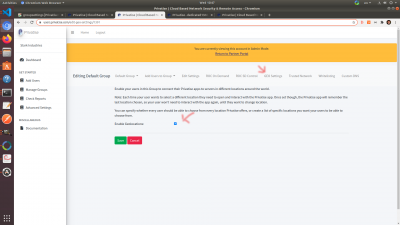
If you have a ROC enabled, it will override GEO Settings as for security, endpoints will be forced to connect to the ROC/VLAN. For users that do not require advanced security and want to use Privatise to surf from different locations, for example for research. You can put the user or device in a group without a ROC and enable GEO Settings as seen below.
Global Trusted Networks
Sometimes you might want to set up automated, global Trusted Networks for users and devices in the group. You would do this if:
1. You want to deploy Privatise primarily on remote devices. For example a laptop that an employee brings back and forth from home to the office. Trusted Networks can turn Privatise off when in the office, and on again when back at home.
2. Some employees travel to different client sites, and you want to disable Privatise on those sites because they need access to that internal DNS for whatever reason.
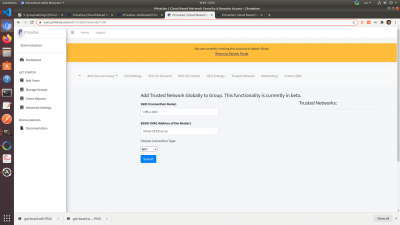
To set up Global Trusted Networks, go to “Trusted Networks” under group settings. There you will see three options:
1. The SSID of the network you want to add. This is for your internal use so you remember what network you're adding. 2. The BSSID of the network you want to add. This is the most important part, as the Privatise app will check for the BSSID of the network interface on the gateway it's connected to to see whether or not it's trusted. 3. Whether WiFi or Ethernet. WiFi and Ethernet typically are on different radio devices on the router/gateway device used to connect to the Ethernet. Because of that, you must specify whether you are adding WiFi or Ethernet to Trusted Networks.
Here's how to get the BSSID of the interface card on the router/gateway you want to add to Trusted Networks.
For WiFi:
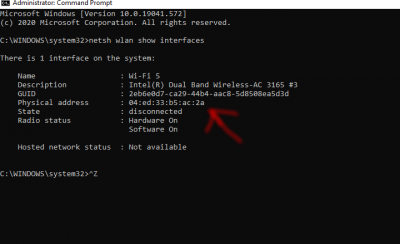
Type netsh wlan show interfaces in the command line (CMD).
Check the WiFi that you are currently connected to, and look for the physical address. That is the BSSID .
Enter that BSSID along with a nickname for your SSID into the Portal.
For Ethernet:
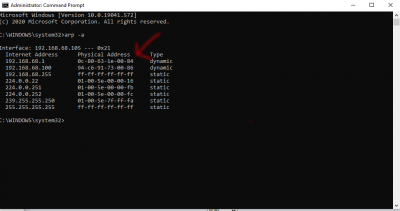
Type arp -a into the command line (CMD).
Check for Internet Address/NAT of your gateway (generally a router). Next to that will be the Physical Address of the gateway. That is your BSSID.
Enter the BSSID along with a nickname where it says SSID into the Portal. Make sure to click "Ethernet" in the dropdown.
Custom DNS
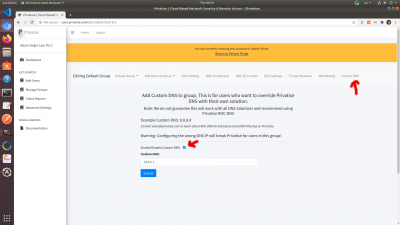
Sometimes you'll want to override the ROC-DNS with a custom DNS solution you might be using. We recommend switching to ROC-DNS, but if you're locked in a contract, here's how to override Privatise ROC-DNS with your own.
Go to Custom DNS under Group Settings on the right.
Click "Enable Custom DNS".
Add the IP of your custom DNS solution
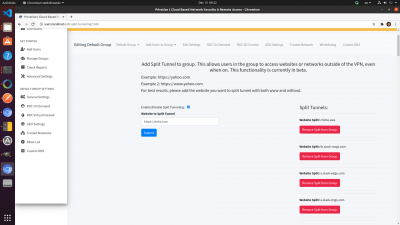
Allow List/Reverse Split Tunnelling
There are some websites that try to actively block VPN connections. In general, there are three ways you can try to bypass a VPN block:
1. Activate TCP under Settings in the app itself (currently available in Windows)
2. Active WireGuard if you have a ROC enabled
3. Add the website to an allow list (Recommended).
To add a website to the allow list, go to “Whitelisting” in group settings, and add the website you want to unblock there. The syntax is:
