Using Privatise for Remote Access
Secure Remote access using Privatise is easy to deploy, and can replace clunky hardware. It can be used for encrypted RDP, file sharing, and integration with a Windows server DC for connecting remotely to an Active Directory domain.
The advantage over using a Privatise Server Agent is that it's easy to setup & allows for secure remote access without having to expose an entire LAN. This makes the connection more secure.
1. You can use Privatise to connect remotely via the Privatise VLAN while still allowing your internal office machines to connect over the normal LAN.
2. Privatise supports Windows Server 2012 and above for integration with your Active Directory Domain Controller.
3. You can create custom Fully Qualified Domain Names and attach them to static internal IPs (NAT'S) of the Privatise agents.
Remote Access is supported by version 2.0.3 on the Windows Agent and above.
Important: When joining an AD Domain, make sure that you have admin access to that client PC in case of any issues or if you have to reset the domain!
Setting up a Remote Access agent for file sharing
Setting up a remote access agent for file sharing is easy to do. Simply follow the following steps:
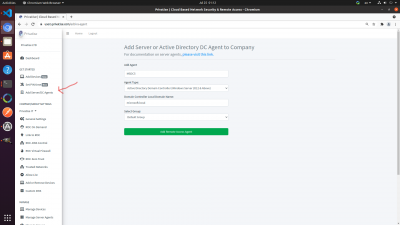
1. Click on Add Server/DC Agents under “Get Started” on the left menu.
2. You will be brought to a page to add either an Active Directory DC Agent or File Sharing Server.
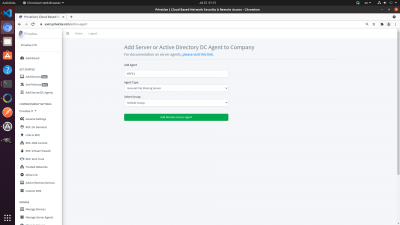
3. Add a name for the file sharing server agent. This is for your own records and keeping things organized.
4. Choose General File Sharing Server
5. Select the group you want to associate the server with.
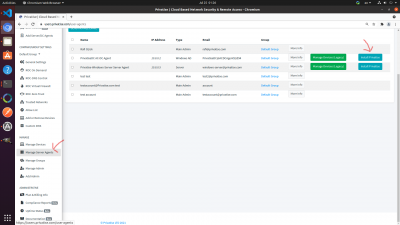
You will now be able to see the new server agent under “Manage Server Agents” under “Manage” in the left sidebar.
To connect to the file sharing server agent using a FQDN or Fully Qualified Domain Name. Go to your ROC-DNS Control Dashboard.
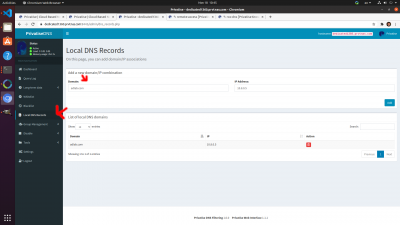
1. Go to Local DNS Records
2. Add a Fully Qualified Domain Name on the left, and static IP of the Privatise agent you want to connect to.
Installation
To install the Server Agent, you should login to the server you want to install it on:
1. Then login to your managed company portal from the server itself.
2. Go to “Manage Server Agents” and Install Privatise with the corresponding agent directly onto the server as seen in the image below.
3. Install the downloaded Privatise Installer executable on the server.
Troubleshooting
Q. Can't Connect to AD Domain Controller
A. Check IPConfig on the AD DC, and make sure that it has the correct Static IP. Make sure that you only used the agent once, as static IPs do not support multiple installs. On the client machine, make sure that the agent you have installed is in the same group as the AD DC.
If that is correct, make sure you configured routing correctly on the Windows Server. See this video for more information.
Q. I'm not able to add an AD DC or File Sharing Agent
A. Make sure that the group you want to add the agent to has a ROC. Please see Provisioning a ROC for more information.
Q. Installing an agent broke my file sharing server or DC locally & I had to remove it. What happened?
A. Most likely you did not install the correct agent on the DC or file sharing server. DC & file sharing agents are specifically configured to allow for normal LAN access.
Q. Privatise keeps restarting on the Domain Controller
A. Disable DHCP autoconfiguration. Please see Disabling DHCP Autoconfiguration for more information.


