Atera Deployment Guide
Create the Privatise Deployment Script
Before beginning, make sure to grab your license key for your Partner Account. To grab your license key, go to setup RMM in the Partner Dashboard here once you're logged in to your account: External Link
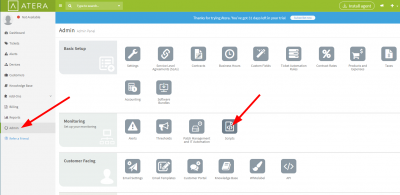
1. Login to your Atera instance and click Admin, then Scripts.
2. Click on the “Create Script” button located on the right-hand side of the Scripts page.
3. Fill out the following fields:
Description: "Privatise Deployment Script"
File Name: "PrivatiseDeployment" (select ".ps1" as the extension)
Max Script Run Time: 5
Run as: System (Unless you can run as admin rights with current user, in which case you can run with current user)
4. Download the Privatise deployment powershell script here.
5. Copy the contents of that link after opening it, and paste it into the Script Editor in the “Create Script” Window that popped up in Step 1.
6. Scroll down to around line 46. You're looking for sections that start with $PARTNERID and $TEAMID. It should look similar to this:
# Replace __PARTNERID__ with your license key.
$PARTNERID = "ENTER_LICENSE_KEY_HERE"

# Replace TEAMID with the name of the organization or company.
$TEAMID = "ORGANIZATION_NAME"
7. Enter your PARTNERID where prompted in the script. For TEAMID, you can either enter the name of your client organization manually or alternatively you can create a variable and dynamically add the company as you deploy in Atera.. To create a variable in Atera, the TEAMID should be as follows:
$TEAMID = {[privatise_organization_name]}
8. Click the “Create” button in the lower-left corner of the “Create Script” window.
Deploy Agent(s) via Atera
1. If deploying to multiple devices, we recommend you navigate to “Customers,” “<customer name>,” then “Devices” tab to deploy Privatise to a specific customer.
2. Once in the Devices tab, click on the endpoints you wish to deploy Privatise on, and click the “Run Script” icon.
3. In the “Run Script on Devices” dialog, be sure to select an appropriate “Automation Expiration” option and then click the “Next” button. (Note: The default Automation Expiration policy will skip offline agents, and you will need to manually re-queue them when they are online.)
4. In the next dialog you will need to specify the Organization Key to be used withinPrivatise. In almost all cases this is the name of your end customer. Once you have this specified, click the “Run Script” button. If you don't already have the customer company listed in the Privatise Partner Dashboard, deploying here will automatically add it to the Privatise Dashboard. If the company already exists, make sure that the name you use here for the organization key and the company name in the Dashboard match to avoid duplicates.
5. You should receive a popup that the job has been queued.
6. When you view this report, you can drill down to the individual endpoint to see the script's outcome. Click on the arrow to the left of the Customer Name and then the information icon to the status details' right to see the logs.
