Datto Guide
Deploying Privatise with Datto RMM (Using the PowerShell Script)
This guide provides a basic overview of deploying the Privatise Agent using Datto RMM—formerly Autotask Endpoint Management (AEM). While we are not able to offer comprehensive support for Datto RMM, there is documentation available related to scripting.
This deployment component will use a global variable named PRIVATISE_PARTNERID (defined in Step 1 below) for the Privatise “license key” and the Datto RMM “Site Name” as the Privatise “TEAMID” ie the company in the Privatise Portal. (Datto RMM exposes the site name by setting an environment variable named CS_PROFILE_NAME, which is what the component uses for the Privatise team/company name.) If the organization does not yet exist in Privatise, it will be created automatically. In the rare instances where the CS_PROFILE_NAME variable is not set, the placeholder organization MISSING_CS_PROFILE_NAME will be used. You can rename an organization in the Partner Portal.
Here is the general flow for most Partners:
1. Create a company name in the Privatise Partner Portal, make sure that the company name matches Datto. 2. Create a new component, and copy this PowerShell script.
Variable Mapping:
• Datto RMM PRIVATISE_PARTNERID variable → Privatise license key (manually retrieve from the Privatise Partner Portal) • Datto RMM Site Name (CS_PROFILE_NAME) → Privatise team/company Name
Installing any product should be a breeze, and that's especially true with Privatise. We've created a deployment script for Datto RMM that will install the Privatise Agent on 64-bit Windows systems (Vista/Server 2008 and above) without any user interruptions or reboots. This is a fivestep process that involves:
- 1. Configuring your Privatise PARTNERID in Datto RMM
- 2. Create a new component
- 3. Copy this PowerShell script into the new component.
- 4. Schedule the script to run.
- 5. Verify the job completed successfully.
Configure Your Privatise PARTNERID
1. From the “Setup” menu, select “Account Settings”:
2. On the “Setup” page, navigate to the “VARIABLES” section and click the “Add Variable” button:
3. Create a variable named “PRIVATISE_PARTNERID” and enter your account key in the value field:
(To get Privatise PARTNERID account license, go to setup RMM in the Partner Portal here: External Link
4. Create a new component, and copy this PowerShell script.
Schedule the Script to Run
You can deploy Privatise Agents with Datto RMM by either the sites list or the devices tab within a site. In this example, we're doing it from the Sites list, but the process is precisely the same from the device tab, with the exception of choosing the specific devices for deployment vs. the entire site. If you've added it as a favorite in step 4 above, you can use the “Run a quick job” button vs. the “Schedule a job” button to perform a quick one-off install from both the site and device lists.
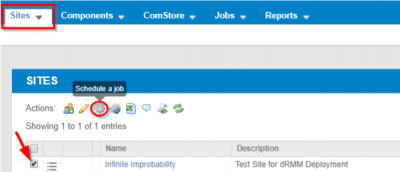
1. On the Sites tab, select the site you want to deploy to and then click the schedule job button (looks like a cog wheel).
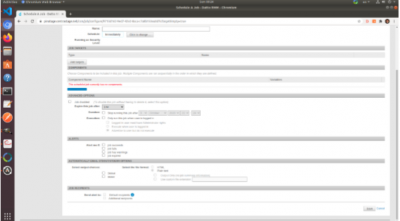
2. In the new “Scheduled A Job” view, name the job and click on the “Add a Component” link:
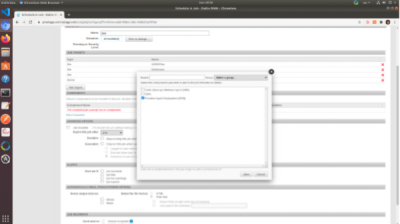
3. In the Component option window check “Privatise Agent Deployment [WIN]” and click the “Save” button:
4. Make sure that the site target is shown under targets! Otherwise, click on “Add Target” and add your site(s). c
5. When prompted to “run this job now” click “OK”:
Verifying the Job Completed Successfully
You can check for deployment errors by viewing the job status.
1. Navigate to the Jobs tab > Competed Jobs tab > click on the job 2. On job view, click the “stdout” and “stderr” buttons to view the log from any agent that may have failed to aid in troubleshooting.
If you need any assistance Privatise, or if you notice a step that's missing, please contact us at support@privatise.com.


