Getting Started with Privatise:
Starting a Trial:
After having a call with one of our Account Executives and seeing that we can be a good match, you'll be invited to the Privatise Partner Program trial.
To accept the trial and get started:
- In the email as shown below, click on the “Privatise Partner Portal” which is a link to your trial signup page.

- Create a new password. After choosing a password, check the box with the words “Privatise Master Partnership Agreement” and click “Go”.
- Once you create a password, you'll be brought into the Partner Portal under your trial account, where you'll be able to add a new company.
Adding a new Company Account Manually:
Here is how to add a new company account manually through the portal. If you wish to deploy through an RMM, please click here for RMM deployment documentation.
To add a new company manually:
- Go to “Add a Company” in the left sidebar in the Partner Portal OR click the green Add Company button in the dashboard of the Partner Portal.

- Add company details. Here you'll put in the main admin firstname, lastname, email, and the company name you want to add.
- The email you add will be the company admin account for that specific company if they want to self manage. It does not have to be used and can be any email, but needs to be unique! Do not use your partner email there as it will likely error.
- Click on the “Add Button”

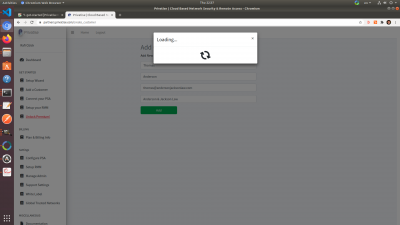
- You will see a popup with a spinning loading icon as the customer is processed by our system. This should take only a few seconds.
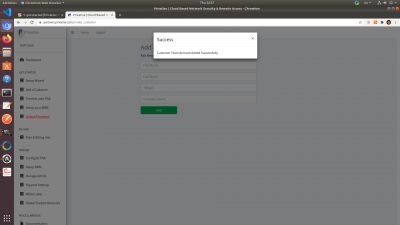
- Once complete, you should see a “Success” popup.
- If you get an error:
- Make sure you used a unique email for the admin email. If you don't want to give your company admin access, try using a fake email at your own domain. For example, if your company is called “msptech” and your domain is “msptech.com”, try creating an email CUSTOMERCOMPANYADMIN@MSPTECH.COM to be the admin account with the company.
- Make sure the company your creating does not already exist in your dashboard.
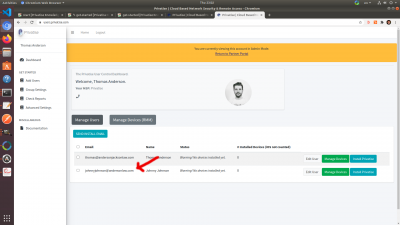
- After getting the success message, go to “dashboard” in the left sidebar, and you will see your new company listed under your company's


Accessing a Company's Managed User Portal
Once you create your new company account, you'll want to go ahead and manage that account. Managing the account lets you manage your company groups, add users, deploy agents and more. Let's get started:
- To manage a company, please click on the “Manage Company” button in the Partner Portal Dashboard.

- You should now be inside your customer's Managed User Portal. You will see that you currently have one user, the admin account you deployed previously.

- To add additional users, click on the “Add User” menu button on the left sidebar.

- You will be brought to an “Add Users” page. You will be able to add a User individually, or invite many emails at the same time separated by a newline. We currently have a limit of up to 50 emails being able to be invited in each bash due to mail server limitations.

- Like previously when you added a company manually from the Partner Portal. A loading and success popup will show.
- If you have errors:
- Make sure you put in a unique email.
- If loading was stuck, please click on “X” to to exit the loading popup and refresh. Make sure to enter a unique email and try again.
- If adding users in batches, make sure to separate with line breaks and not commas, as sometimes commas causes errors.
- Make sure to have less than 50 emails in a batch. Try a small batch of only 5 emails and see if that works and then increase it to 10, 15, 20 etc. to see if a large batch was causing errors.
- Once added, go back to the Managed User Portal Dashboard. You will now see your new company user!

Manage a Company by Groups
Groups are the fundamental building block of companies in Privatise. Every company has at least one group, but a company can also be broken up into multiple groups. By default, all the new users and devices belong to the default group. You will however be able to add groups, delete groups, split up users between groups etc. Through group policies, you'll be able to provision a ROC (Remote Office Cluster), create custom rules and permissions, have control over the group firewall, and more.
By default, you have one Default Group per company. You can manage it under Manage Groups in the left sidebar.

Once you click on that, you'll want to click on “Edit Group Settings” For the Default Group.

Now you'll have access to the group settings in the Default Group. If you have not added more groups, all of your users and devices will be controlled by the settings in this group.
Within group settings you can:
1. Provision and enable your ROC (Remote Office Cluster) 2. Set up whitelisting for sites you don't want the app to pass through. 3. Access your DNS filtering (ROC required) 4. Access virtual firewall (ROC required) 5. Create global trusted networks.
We recommend you provision a ROC for maximum security. For more information on setting up company settings via groups, please go here: please click here for group settings documentation.